Roughed in a lining for the tunnel bit using a USPS shipping box:
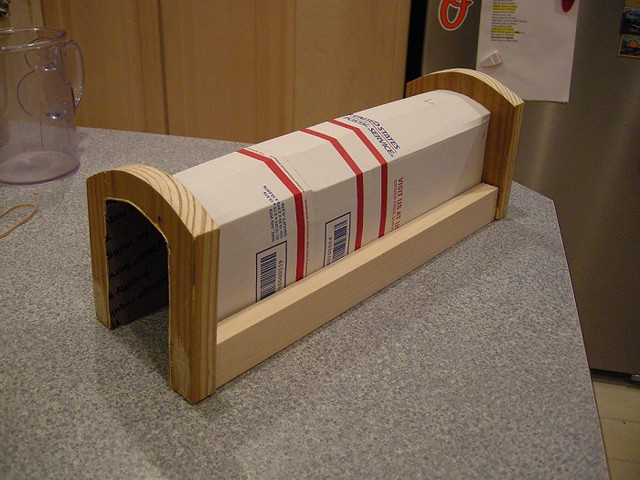
The first of what promises to be a long string of mistakes on this project surfaced with this effort. I had wanted to use cereal-box thickness cardboard, but couldn't find a piece 17" long. I reverted to a piece of relatively thin corrugated found in a USPS shipping box. This made forming the liner into an arch a bit of a challenge. I used an old shipping tube to try to get a nice arch form, but that had mixed results, as the shipping box proved quite a bit more rigid than a single-ply cereal box. It had a tendency to bend incrementally, rather than in a smooth, gradual arch. The less-than-brilliant results can be seen here.
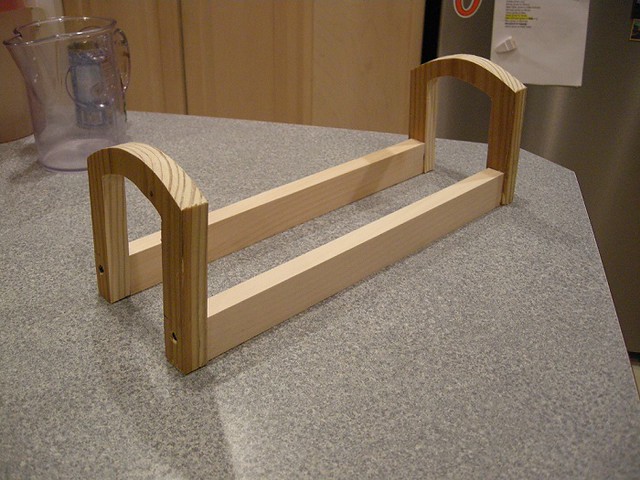
The other thing was when I pitched the portals a few degrees, I didn't take into consideration that the top of each would be slanted those same few degrees. This made cementing in the cardboard liner at each end a challenge. If I'd thought about this ahead of time, I could have cut slots in the liner at each end, making the fit a bit easier, adding some flexibility. Instead, I glued in one end first, resulting in a slight downhill run for the liner. I had to brute-force it back into position at the other end using a healthy dose of Titebond and a few C-clamps. The combination of the force-fit and the poorly executed arching of the corrugated resulted in a slight hump at the center. This may prove a problem, so for now, I've left the liner unattached along the side rails in case I need to try to draw it down a bit.
The next step is to manufacture a couple of additional supports that go over and atop the liner. These will support the base of the structure that goes above. I'm thinking of using foam for this, but if they are not strong enough I'll have to cut them from some one-by. I have a template of the tunnel portals which should possibly help with this. Once I get that fitted, I'll glue the liner to the side rails, adding some more strength.